The 10 Commandments of Sugar Sacrifices | Brew Like a Yeast Whisperer
You don’t need fancy equipment or expensive ingredients. All you need is some fruit, sugar, and a little bit of patience. Oh, and maybe a few spices to make your brew taste like it came from a hipster microbrewery instead of your kitchen counter.
Fouad FARJANI
2/8/2025
Brew Your Own Spirit at Home: A Liberating Hobby That Saves Money, Induces Creativity, and Might Just Make You the Life of the Party
Let’s face it, most of us aren’t going to wake up one day and decide to milk a cow, raise a pig, or grow a field of wheat. But there’s one thing we can do in the comfort of our own homes—brew our own alcohol. Yes, you heard that right. Forget about store-bought beer or overpriced wine. With a little patience, some kitchen staples, and a dash of creativity, you can become the master of your own mini distillery. And trust me, nothing says “I’m a grown-up” quite like serving your friends a glass of homemade apple jack that you brewed in your closet.
Home brewing isn’t just a hobby—it’s a liberating experience. It’s science, art, and a little bit of magic all rolled into one. Plus, it’s a great way to save money (or spend it on more ingredients, depending on how obsessed you get). So, grab your pots, dust off your grandma’s old jars, and let’s dive into the world of DIY spirits. Here’s how to get started in 10 crucial steps, with a few HINTS thrown in to keep things lively.
Why Home Brewing is the Ultimate Hobby? (Besides Bragging Rights)
Home brewing is like cooking, but instead of eating your mistakes, you drink them. And let’s be honest, even a “mistake” can turn into a happy accident. (Ever heard of apple jack? Legend has it, it was invented by someone who left their cider outside in the winter and decided to drink the slushy remains. Genius or desperation? You decide.)
The best part? You don’t need fancy equipment or expensive ingredients. All you need is some fruit, sugar, and a little bit of patience. Oh, and maybe a few spices to make your brew taste like it came from a hipster microbrewery instead of your kitchen counter.
10 Crucial Steps to Start Brewing Alcohol at Home (No Hops, No Super Yeast, Just Pure Chaos)
1. Choose Your Brew (and Your Adventure)
First, decide what you want to make. Beer? Cider? Wine? Or maybe you’re feeling adventurous and want to try your hand at apple jack or even potato vodka (yes, it’s a thing). The world is your oyster—or, in this case, your fermenting vessel.
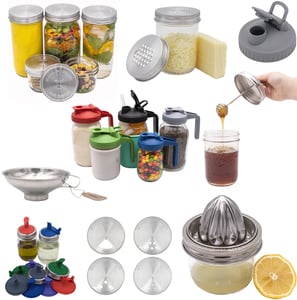
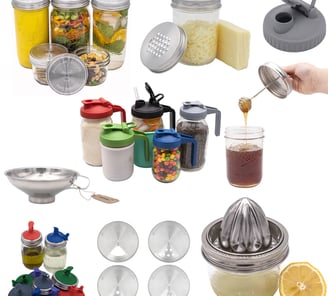
2. Gather Your Ingredients (aka Raid Your Kitchen)
Cider: Apples, sugar, and a yeast starter (more on that later).
Wine: Grapes, berries, or any fruit you have lying around, plus sugar and yeast.
Apple Jack: Hard cider (fermented apple juice) and a freezer.
Yeast Starter: Raisins, dates, or even bread yeast. Forget those fancy super yeasts—nature’s got your back.
3. Sanitize Everything (or Risk Brewing a Science Experiment)
Cleanliness is next to godliness in the world of brewing. If you don’t sanitize your equipment, you might end up with something that smells like a gym sock instead of a fine wine. Use hot water, vinegar, or a food-grade sanitizer to clean your jars, spoons, and anything else that’ll touch your brew.
4. Make a Yeast Starter (Because Raisins Are the Real MVPs)
Forget store-bought yeast. All you need is a handful of raisins, dates, or even a slice of bread to create a natural yeast starter. Just soak them in water for a few days, and voilà—you’ve got yourself a bubbling, frothy yeast culture. It’s like a science project, but one you can drink.
5. Ferment Your Base (and Pretend You’re a Mad Scientist)
Mix your fruit, sugar, and yeast starter in a sterilized jar or bucket. Seal it with an airlock (or a balloon with a tiny hole—improvisation is key) and let it sit in a cool, dark place. Now comes the hard part: waiting. Fermentation can take anywhere from a few days to a few weeks, depending on how strong you want your brew. Use this time to come up with a cool name for your creation. “Grandma’s Closet Cider” has a nice ring to it.
6. Monitor the Fermentation (and Try Not to Obsess Over It)
Check your brew daily for bubbles. If you see activity, congratulations—your yeast is alive and well! If not, don’t panic. Sometimes yeast is just shy. Give it a little stir, whisper some words of encouragement, and wait a bit longer.
7. Strain and Transfer (and Try Not to Spill Everything)
Once fermentation is complete, strain out the fruit pulp and transfer the liquid to a clean container. If you’re making cider or beer, this is where you’d bottle it with a bit of sugar for carbonation. If you’re making wine or spirits, you’re one step closer to glory.
8. Experiment with Flavors (Because Plain Alcohol is Boring)
This is where you get to flex your creative muscles. Add cinnamon, cloves, or ginger to your cider. Toss in some citrus zest or vanilla beans for your wine. Or go wild and throw in a handful of chili peppers for a spicy kick. The possibilities are endless, and so are the opportunities to impress (or horrify) your friends.
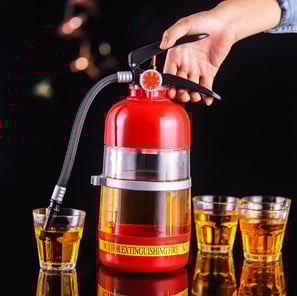
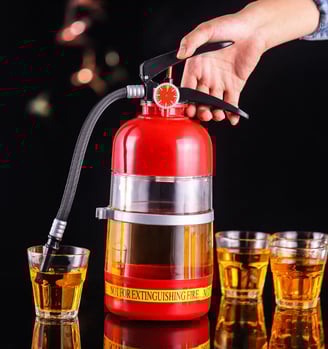
9. Try Freeze Distillation (aka the Lazy Person’s Still)
If you’re making a jacked spirit like apple jack, here’s where the magic happens. Pour your fermented cider into a freezer-safe container and freeze it. After 24 hours, remove the ice that forms on top (this is mostly water) and keep the concentrated alcohol. Repeat this process until you reach your desired strength. Warning: this stuff is potent. Drink responsibly, or at least blame the apple jack for any questionable decisions.
10. Age Your Brew (or Drink It Immediately—No Judgment)
While some brews are ready to drink right away, others benefit from a little aging. Store your wine or spirits in a cool, dark place for a few weeks (or months, if you can resist). The flavors will deepen, and you’ll feel like a true artisan. Or, if you’re impatient, crack it open and enjoy. Life’s too short to wait for perfection.
Why Home Brewing is More Than Just a Hobby (It’s a Lifestyle)
Home brewing is more than just a way to save money on alcohol—it’s a journey into the unknown. It’s about experimenting, learning, and occasionally wondering why your cider tastes like a barnyard. But when you finally nail that perfect batch, it’s pure magic. Plus, it’s a great conversation starter. (“Oh, this? It’s my homemade pear wine. I call it ‘Pear Pressure.’”)
So, what are you waiting for? Grab some fruit, sugar, and a jar, and start brewing. Who knows? You might just discover your new favorite hobby—and a newfound appreciation for raisins.
(*) Tiny Dictionary of Home Brewing Terms (So You Sound Like a Pro)
Starter: A natural yeast culture made by soaking raisins, dates, or bread in water and sugar. It’s the life of the fermentation party.
Fermentation: The magical process where yeast eats sugar and turns it into alcohol and carbon dioxide. Basically, yeast’s version of a night out.
Airlock: A device that lets carbon dioxide escape during fermentation while keeping contaminants out. If you don’t have one, a balloon with a tiny hole works in a pinch.
Freeze Distillation: A method of concentrating alcohol by freezing your brew and removing the ice (water). It’s like giving your drink a winter workout.
ABV (Alcohol By Volume): The percentage of alcohol in your brew. The higher the number, the stronger the drink—and the funnier your stories.
Jacked Spirit: A concentrated alcohol made through freeze distillation, like apple jack. It’s the DIY version of a fancy brandy.
Carbonation: The bubbles in your beer or cider, created by adding a bit of sugar before bottling. It’s like giving your drink a fizzy personality.
Aging: Letting your brew sit for weeks or months to develop deeper flavors. It’s like marinating, but for alcohol.
What’s the weirdest thing you’ve ever brewed? Share your stories (and recipes) in a comment below! 🍷✨ or simply reach out on Social Media